
Growing up in the eighties I listened to more gangster rap and hip hop than any other music. My 5 year old's favorite song is Brass Monkey by the Beastie Boys. I kind of fear the day when they find my stash of tapes and cd's. Yes tapes...as in cassette tapes. Not eight tracks (although I am old enough to rememer those too).
Anyways, the dookie bracelet is soft, comfy, and super easy to make. The ones below are from one of my favorite etsy shops, NakiMuli. She is super bad and I want to buy every single pair of leggings she has in her shop.
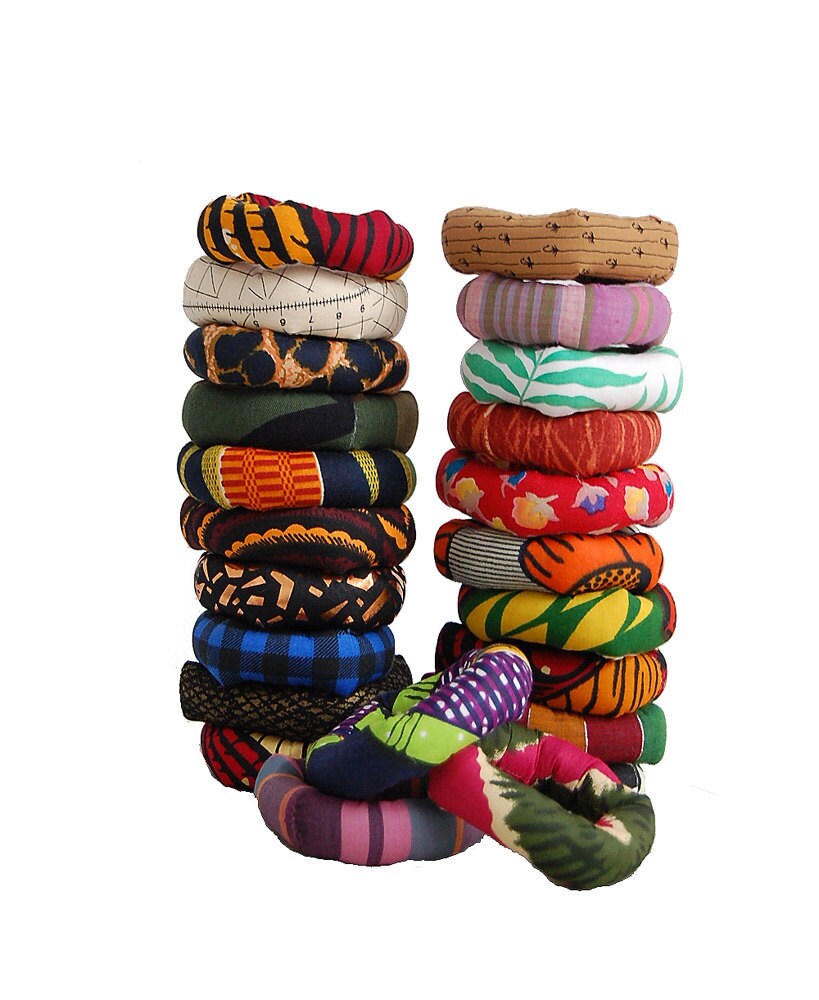 |
| NakiMuli |

Supplies:
Fabric scraps: the crazier the design, the better
sewing machine or needle and thread
scissors
stuffing

1. Cut a piece of scrap fabric approximately 11" x 4" (give or take depending on your wrist)

2. Fold over one edge and stitch so you have a finished edge.

3. Fold over lengthwise with right sides together and stitch along outer edge leaving one end open.

4. Turn fabric right side out.

5. Grab your stuffing and fill it up.
6. Put the unfinished end inside the finished end and stitch closed either by hand or machine. I did both and like the way hand stitching turned out better.


Make a ton of them! If you try it out I would love to see them. Post a link in the comment section if you do!
Linking up to the great parties on my "I like to party page".
Peace,
This is definitely going on my 'to do' list! I've a whole suitcase full of scrap fabrics that are crying out to be used for something interesting :)
ReplyDeleteI have Brass Monkey stuck in my head now lol
Oh my gosh I love that idea! Now I can finally wear jewelry that Izzy can't use as a weapon against me :D
ReplyDeleteIt's an amazing idea!!!
ReplyDeleteThose are cute! I'm going to try and make a few this month. You have the best DIYS! :P
ReplyDeleteit's official! i will now have beastie boys in my head all night. just so long as i don't get 'hey, ladies' in my brain... whoops! too late!
ReplyDelete;)
chrissy
http://www.mydearwatsonblog.blogspot.com/
So cool!!! It's like a stuffed scrunchie!! I was just trying to figure out how to make "rings" for a CD holder to use as a toy for my son, and these would be perfect! (Random, I know). Thanks for the idea!
ReplyDeleteVery original and cool. Thanks for sharing how to do this really cute bracelet. I "pinned" this on my pinterest page. Thanks again. Am following you now and also by email. You are a creative person. Would love to have you also follow me on the new Linky tools. It's easy to add to the blog since the Google connect will soon not be operating. Best wishes, Linda
ReplyDeleteOh, how fun!! I'm in the process of transferring my husband's mix cassettes to CD's since his car no longer has a cassette player. He was so disappointed when he got the new car. I had to make him CD's right away. I would like to invite you to share at our Sharing Saturday. This past week's is still open at http://craftymomsshare.blogspot.com/2012/02/sharing-saturday-7.html or feel free to join us this week.
ReplyDeleteThank you for sharing it at Sharing Saturday!! We hope you will join us again this week!
ReplyDeleteFinding fabric...and hope to get this done! Thanks for sharing this today:D
ReplyDeleteI love these!
ReplyDeleteI really like the fabric that you used! Stopping by from Keeping it Simple. www.bearrabbitbear.com
ReplyDeleteStopping by from the Motivate Me Monday Blog Hop! http://queenofsavings.com
ReplyDeletegreat way to use up all those pretty scraps that we have no idea what to do with thanks for sharing come see us at http://shopannies.blogspot.com
ReplyDeleteI have added this to my projects to do folder :) I love it and know just the person I am going to make these for. I love this sharing of ideas and projects, I will never run out of things to make!
ReplyDeleteCAN YOU POST A VIDEO OF YOU MAKING ONE ? AND DO YOU HAVE A YOU TUBE PAGE WHERE YOU CREATE DIY'S
ReplyDeleteAmy,
ReplyDeleteI made these several years ago and as recent as a month or two ago. They are fast and easy to make. One difference in mine are I made them a little thinner and added beads all around. I like your too. Next time I make some I will make the bigger ones with bigger beads and add some charms.
Great idea! I think I'll fill mine with poly beads just to see how that works.
ReplyDelete